
The costume is the Project Diva Kimono outfit, and was all made from a hand drafted pattern. I had some difficulty getting the right colored fabrics for this, but in the end I'm OK with what I found.


- Sewing silky fabrics.
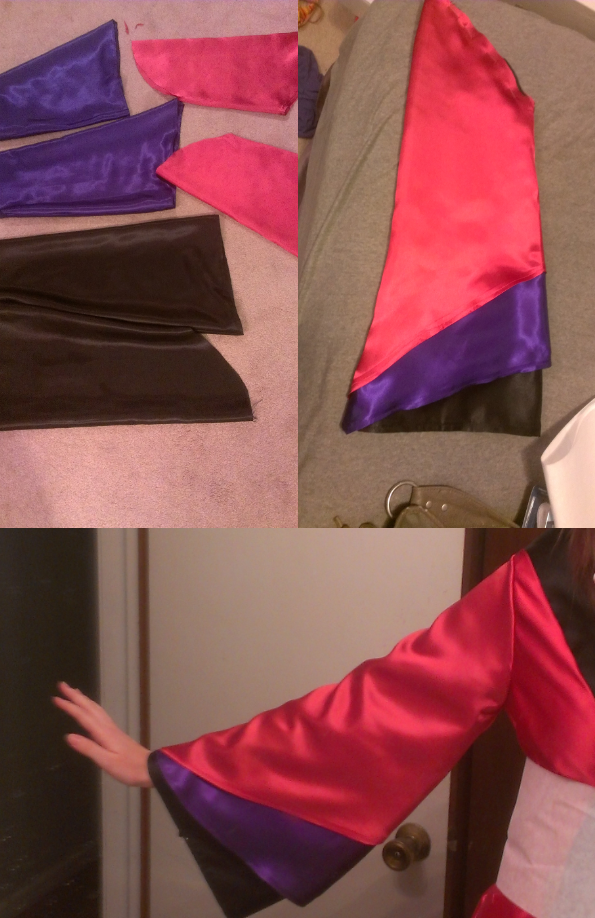
- And sewing sleeves.
SIX sleeves to be exact.


Top before sleeves were attached


I followed used the same idea for Alice's obi on Luka's. It attached at the front and was secured with velcro. I then added button snaps to the bow once it was finish and made it detachable from the main piece for better transportation.

I also got to bust out the fabric paint again for this! I was able to use leftovers from my Alice cosplay which was convenient since jacquard is expensive and my JoAnn's doesn't carry it anymore (those assholes!!)
I really didn't get a good picture of the final product when it comes to the Obi's bow but you can see it in the final picture.
For the main skirt wanted to achieve the crinkle and gradient effect I saw in the ref pics. To do this I actually hand dyed Muslin fabric, twisted it up and let it dry wrinkled.

I dyed the first section purple, then flipped it and dyed the other part pink.


I think one of the things I loved most about making both of these costumes was the accessories hehe ^.^ I used some extra fabric from the hand dyed piece to make my rose clip along with some satin fabric and a silk rose. Both the giant bow and rose had metal hair clips secured to the back of them.
As far as the rest goes, the other black skirt looking portion of the dress was just doubled silk fabric. My shoes were some wedge booties that I made cuffs for. My tattoo was made by me as well using Papillo tattoo paper. I used it to make my friend Linda's as well after making the design in Illustrator. If you want a good tutorial on how to use this stuff check out Vensy's tutorial. I used it, and it turned out wonderful! Vensy is so great <3
Here is the finished product after all that!

Photo by Mike Tinsley. Miku cosplay by Linda!!
Breakdown for Echo will be on the way soon. Thanks for stopping by!
-QK
waaaaoooow!!! <3 . <3
ReplyDeletethanks!!
could you please please pleasssseeeee share the pattern? i really suck at making it and i failed once already :(
ReplyDelete