So now that Naka-kon is over and it has been debuted, I'm going to post how i made my American Mcgee's Alice Silk Maiden cosplay.
This was one of my top favorite dresses in the game and I wanted to cosplay it SO badly. The problem was the FABRIC. There is NOTHING out there that comes even close to matching this dresses fabric pattern, so I had no idea what to do. I ran into a friend on DA though who had done the cosplay and had hand painted all of the fabric and said, "Why didn't I think of that!"(
Her Account) Her dress was incredible and I was so impressed with the painting. I initially thought there was no way I could do it, but after I speaking with her and getting some helpful hints and encouragement, I decided to give it a try. After all what could I lose? (except a shit load of money)
Why a bunch of money?
Because Neopaque Fabric Paint is expensive as shit.
Its about 5 bucks a bottle and I needed A LOT of it.
Using a different paint wasn't really an option since everyone I talked about this (which was a lot) said, "OMG Neopaque or nothing, it's the best!" So I used it, and was very glad I did. That stuff is legit.
But we'll get to the painting later..
To begin I hand drafted a pattern.
I used muslin so I could put it on my purty new dress form and adjust it as needed. This was the first time hand drafting a pattern on my own so it was a learning experience. My friend taught me how to do it on muslin, but I also had been show the same thing with newspaper. So to practice using both I drafted Saeko's shirt with newspaper and Alice's dress with muslin since it was more appropriate. This all may seem like a given to you all who have more experience, but I'm new at this so STFU. I know its all very basic :'(
I winged it on the shapes for the bodice and was lucky it tuned out OK. The rest was pretty self explanatory, a lot of rectangles and such.
After getting the pattern I liked, I started painting..
Started with the sleeves. I used Neopaque Lumieres paint because I hoped it would make the flowers look like they were apart of the silk, or screen painted. I used super opaque neopaque white as a base so the colors would POP.
I taped everything down on top of some newspaper so it wouldn't move or mess up my mom's nice table.
I got lazy and lost the newspaper eventually. I had to do this in the kitchen and our TV in there doesn't have cable, just a DVD player. So I busted out my Ghost in the Shell DVD's and some good old Metalocalypse to get me though all the painting.
As I made this I attempted to make get my painting as close as i could to the reference pictures I screen capped. Not just in how the flower's, leaves, and butterflies looked, but also where they were placed. It didn't end up perfect but it was pretty damn close.
I used an iron on the back of each piece per the paint's instructions to set the paint or whatever.
When I first started doing this I was all like..
Then I got to the largest piece and..
I trudged through though.
Last thing to paint was the Apron. I just used the same muslin I used for pattern make and doubled it up when I was finish painting it.
(Symbols don't show up every well thanks to my camera phone.)
After All painting was done the next thing I did was construct the top.
Starting to look more like a Kimono!
I made the Ruffle for the neck line next. I cut some strip of fabric using my Muslin again and folded them over. Then I pressed them and pinned them so my ruffles wouldn't look derpy since I'm not talented enough to make them as I put it through the machine yet.
The result..
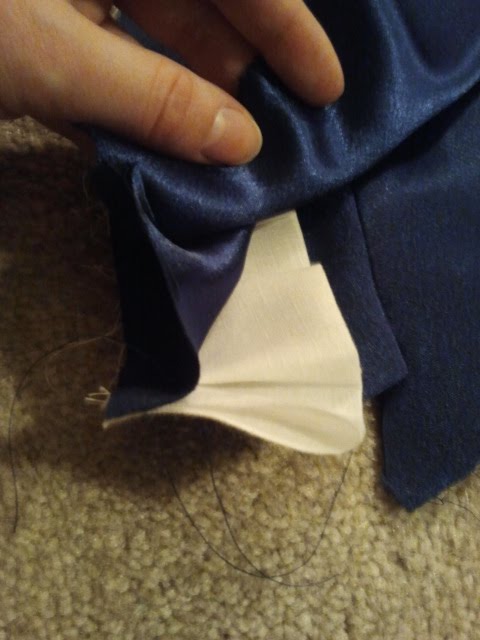
After making the ruffle I sandwiched it between the painted fabric pieces and some duplicate pieces I made so I could line it, then sewed it closed.
I attached them at the shoulders..
And there you go!
So pwetty :o
I attached the sides and then basted my skirt and attached it to the bottom.
Before I attached the sleeves I drafted a pattern for my apron and obi. As you can see from the picture, for the inside of my obi I used a very stiff interfacing. I'll get to that more later... >o>
Then next there was sleeves...
God I hate sleeves.
First I sewed the ribbons onto the cuffs. That was very time consuming but good practice for sewing strait lines, holy crap.
Next I basted my sleeves and made that oh so wonderful POOF. I have to say I did significantly better basting/sewing these sleeves compared to my first Alice costume, which made me happy :).
.... stupid sleeves.
Now back to the obi. Instead of layering this with two pieces of stiff interfacing to get the two different colors, I stuck with one to avoid making it super bulky. What I did was I covered the interfacing piece with the light pink fabric first by making a "tube" for it, then sewed the dark pink on top of that, making this..
Sorry, photo is upside down..
Then to make it somewhat adjustable but still secured, I sewed a few pieces of Velcro to each side.
The bow was attached via two humongous snap buttons that I don't have a picture of. The Bow itself was essentially just two long rectangle met together then the dark pink one was placed on top of the light pink one and sewed together.
For the obi's mask...
I originally made this out of a different material and it was a colossal failure. My first one looked better than the final product, because model magic is really hard to get nice details out of, but you live and learn I guess :( For the second version, I drew out the size I wanted on paper then used an aluminum foil base and covered it with model magic. I sculpted the features, let it dry, then painted over it with acrylic and sealed it all with Modge Podge. After that I covered the back of it with felt and hot glued two long clips to the back which slid easily into the bows holding it in place :)

Last (even though it wasn't made last) we have my underskirt. Since in the game if you look up Alice's skirt (not that I did or anything) you can see that she does have a petticoat underneath, and the the ruffle isn't just attached to the bottom. I could have just attached it to the bottom, but I did that with my wonderland Alice, and in a few photographs I noticed it showing and it really bothered me that I didn't put something underneath. So I decided to do it right with this dress.
This was pretty strait forward..
I sewed a long tube out of an even lighter pink then I used for the obi, and then pinned it into a ruffle on the edge of my shear fabric.
After sewing it, I gathered the top over some elastic that fit my waist and closed it up.
And then when you put all those things together you get...
ALICES'S SILK MAIDEN DRESS!!
The top two photo's don't include the turquoise and dark blue cords that tie around the obi, I wore them later. Other than that, There it is! This cosplay was really a challenge and a blast to make. If you have any questions feel free to contact me! You can find all my profiles under my contact tab ^.^ Thanks so much for taking the time to check out my process. I'll leave you with a few photos taken by the amazing Max Phillips! If you want to see more make sure you visit my
Deviant Art page and have a look!
Now if you'll excuse me, I have a Caterpillar to find..
 Photo by Vangaurd Imageworks Image is subject to copyright do not use or alter without consent *Click to see full size!*
 Photo by Vangaurd Imageworks Image is subject to copyright do not use or alter without consent *Click to see full size!*
 Photo by Vangaurd Imageworks Image is subject to copyright do not use or alter without consent *Click to see full size!*
Thanks for stopping by!
-QK